Kāhu QuickStart Guide
Hardware Setup
Connections
The Gradient, Receive, and Transmit connectors are located on the front of Kāhu as seen in the image below. The channels in each bank of connectors are indexed from left to right, starting at 0.
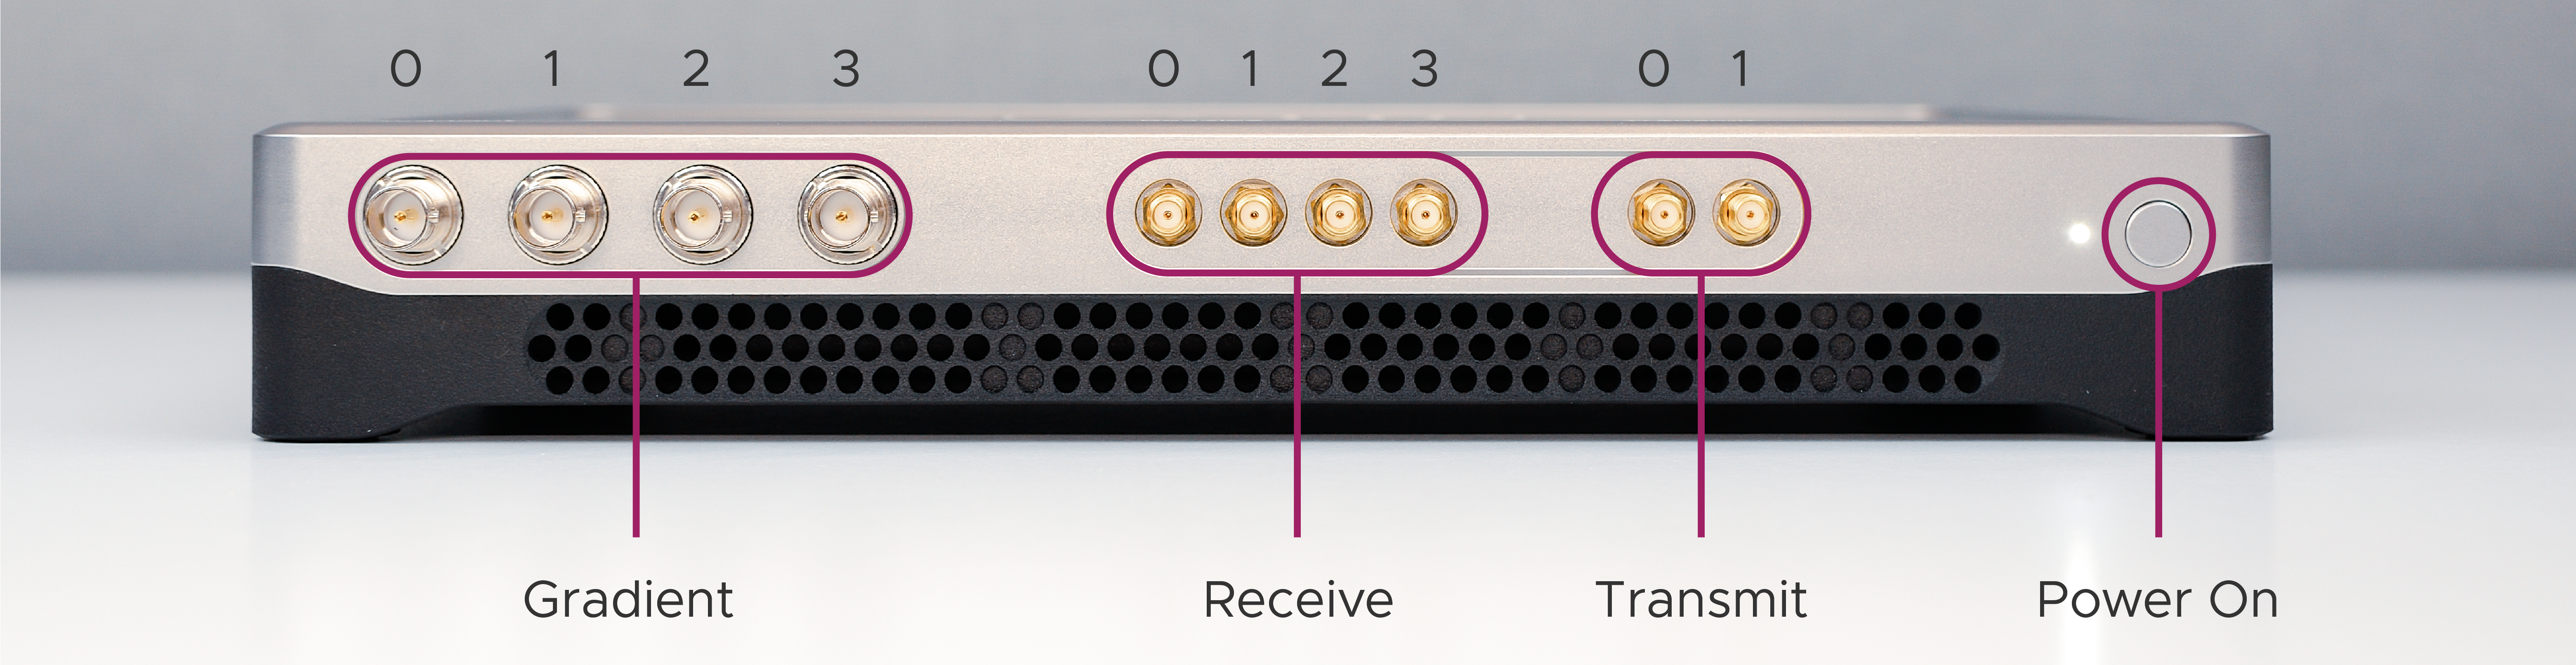
Base model front connectors
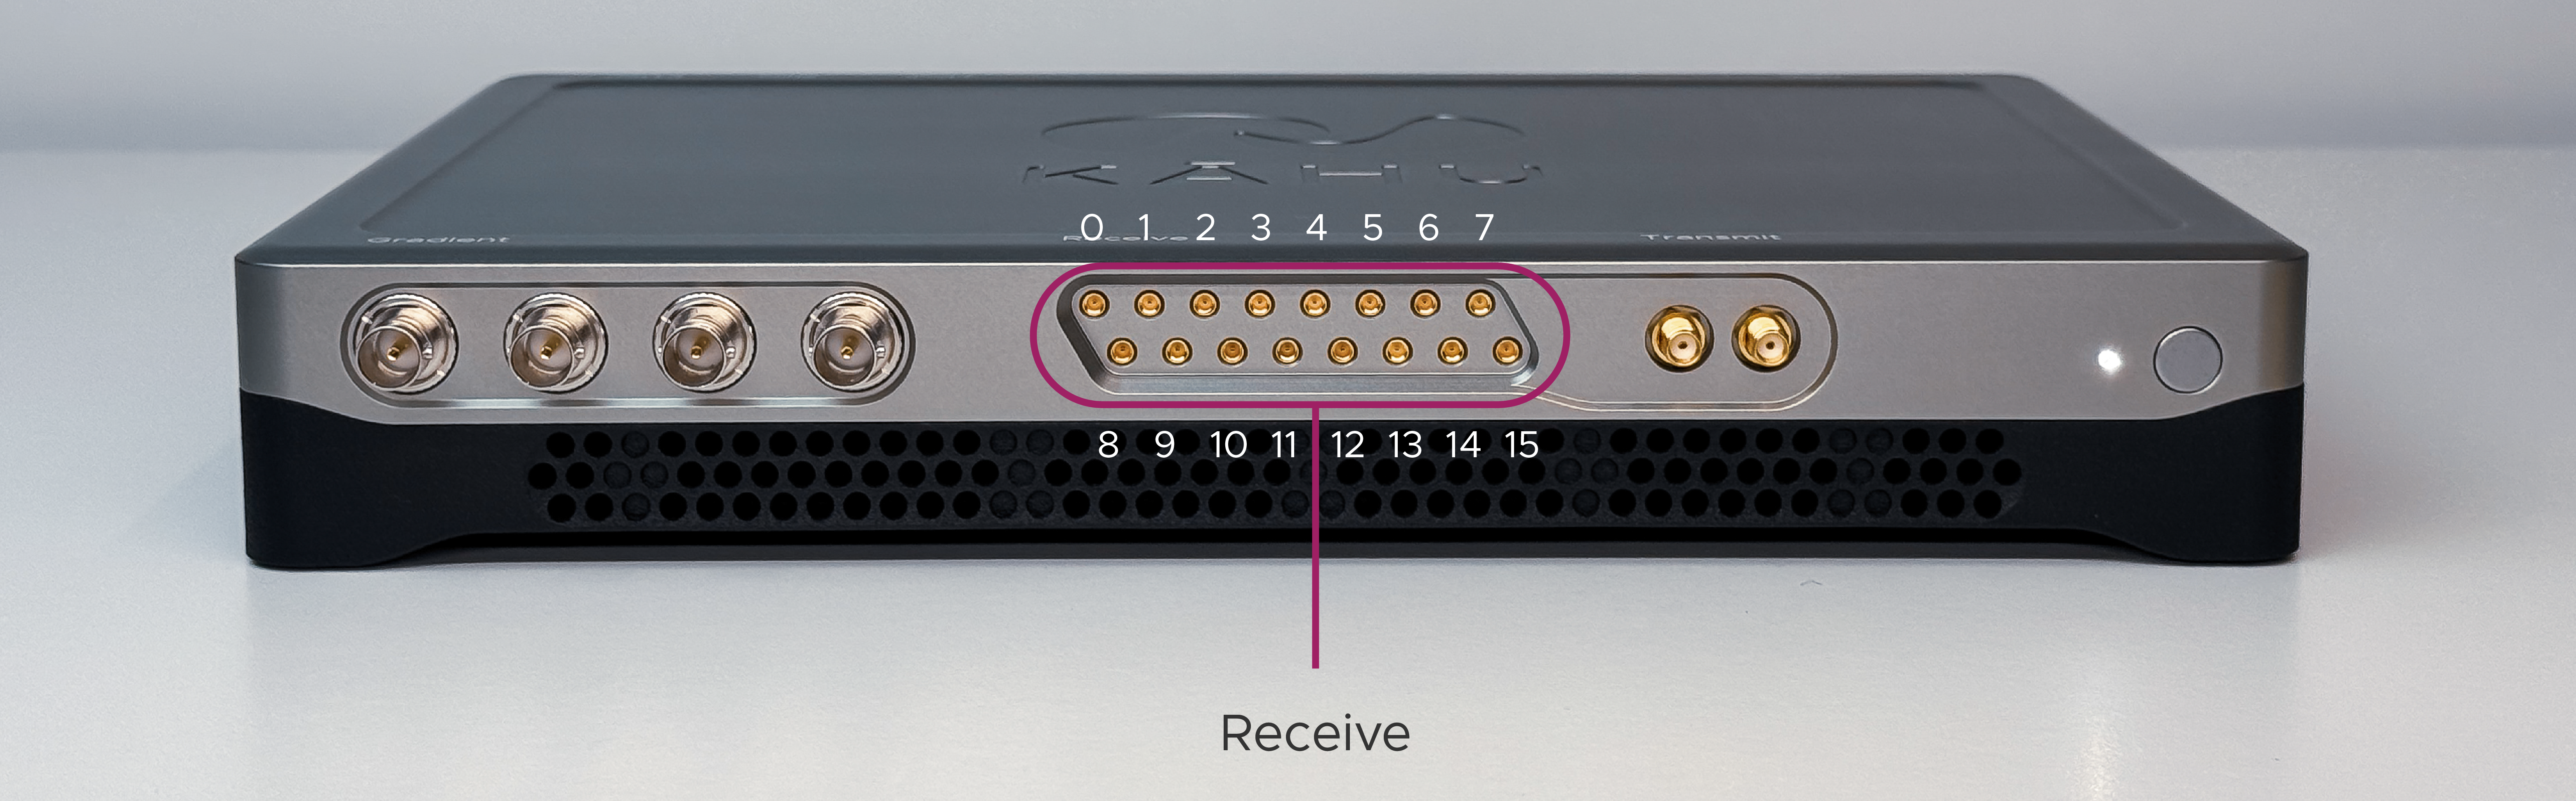
16 channel model indexing
On the back of Kāhu, you will find connector ports for: 24V power input, GPIO, USB, Ethernet, SFP+, shim/gradient amplifier interlock TTL outputs, Shim control analog outputs, and PT100 temperature sensor inputs.
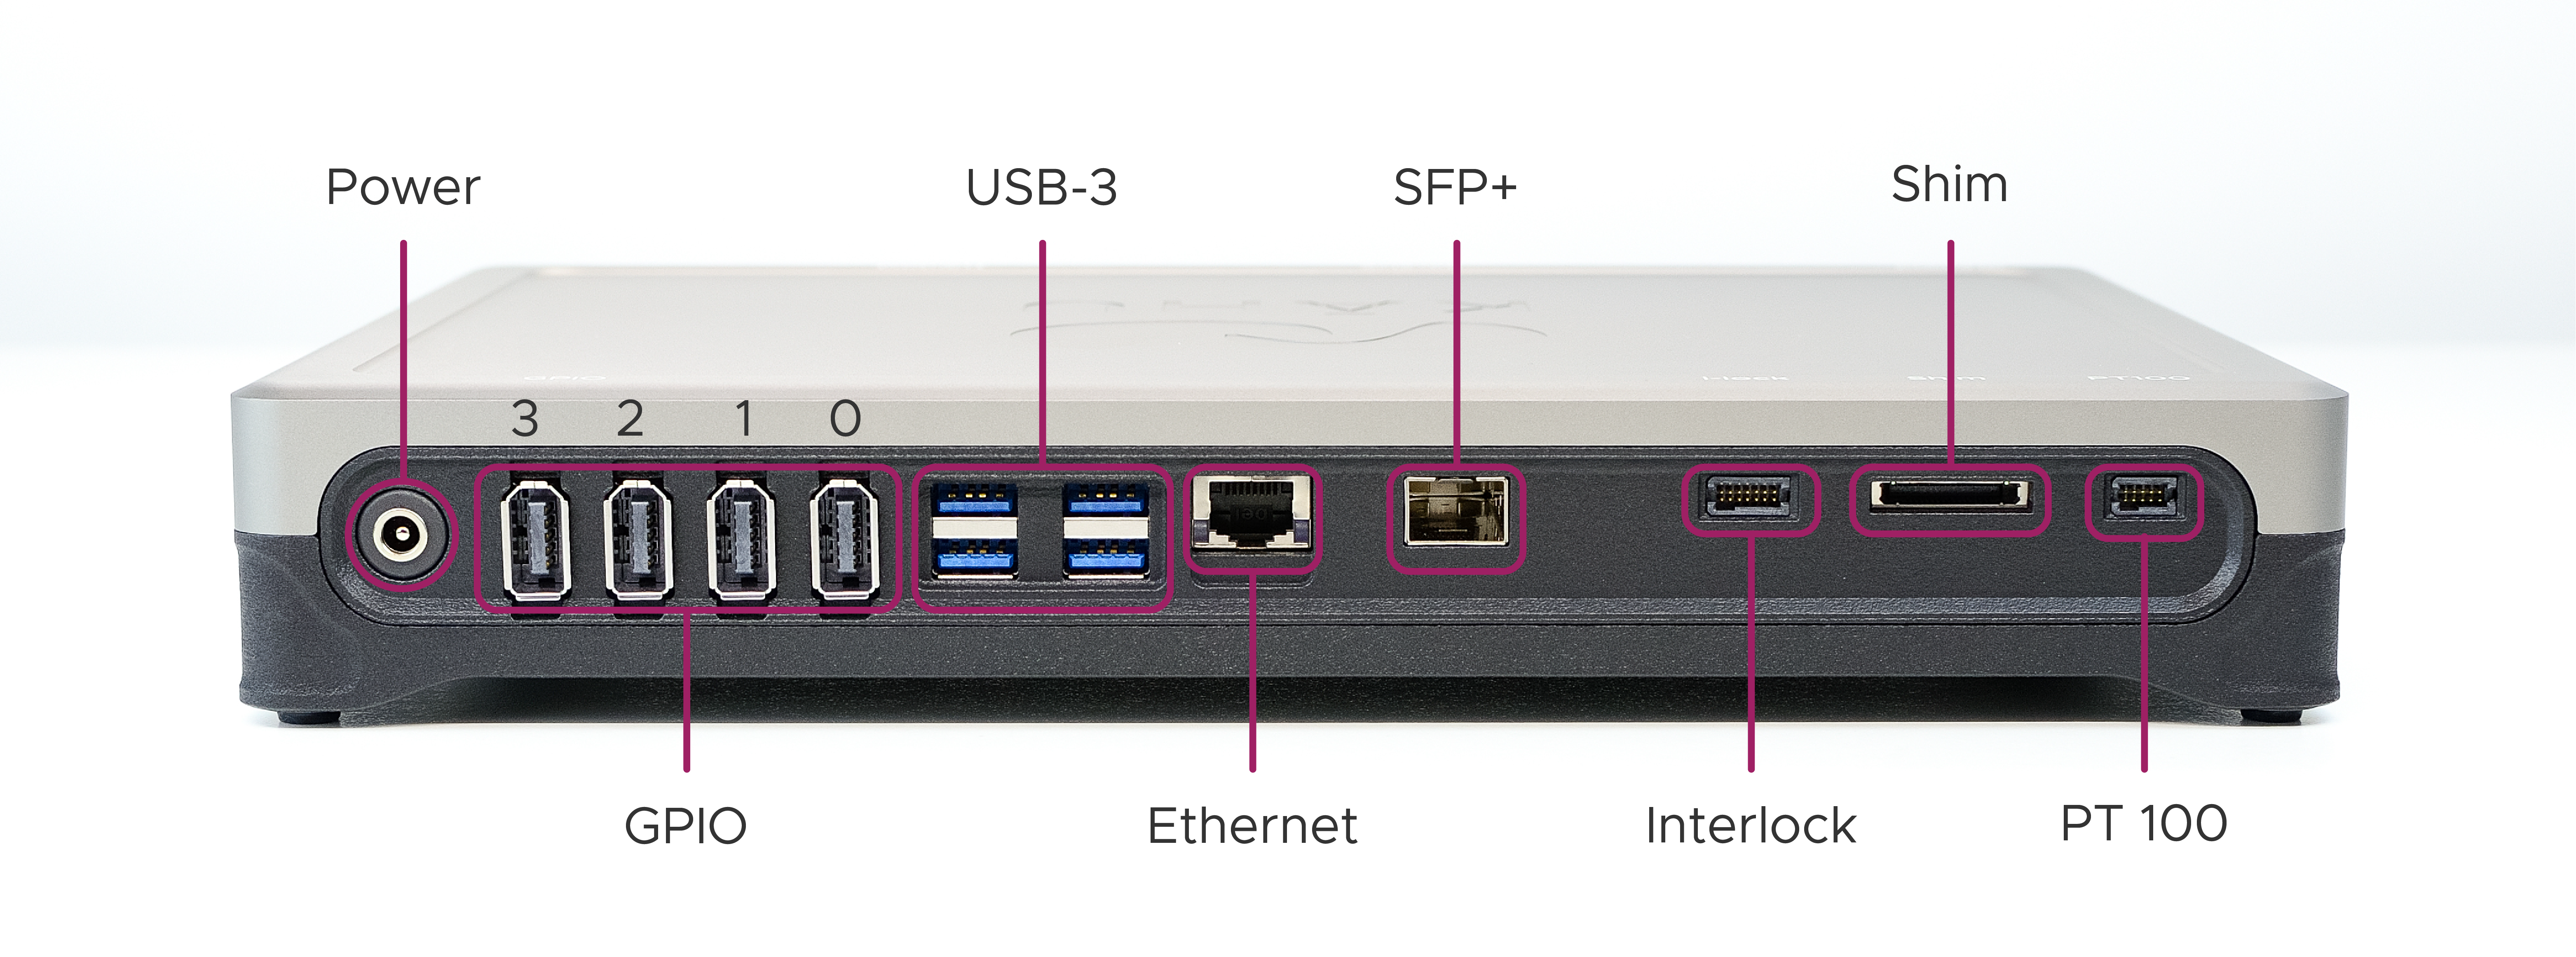
Rear connectors
Power up
To get started with the Kāhu hardware, simply plug in the (24V DC, 90W) external power brick to the back of Kāhu, then connect it to your PC or router via an Ethernet cable to provide network connection. For more information on this, see Connecting to Kāhu. Finally, press the power button on the front of Kāhu to power on the system. When powered on successfully, the white LED next to the power button will illuminate.
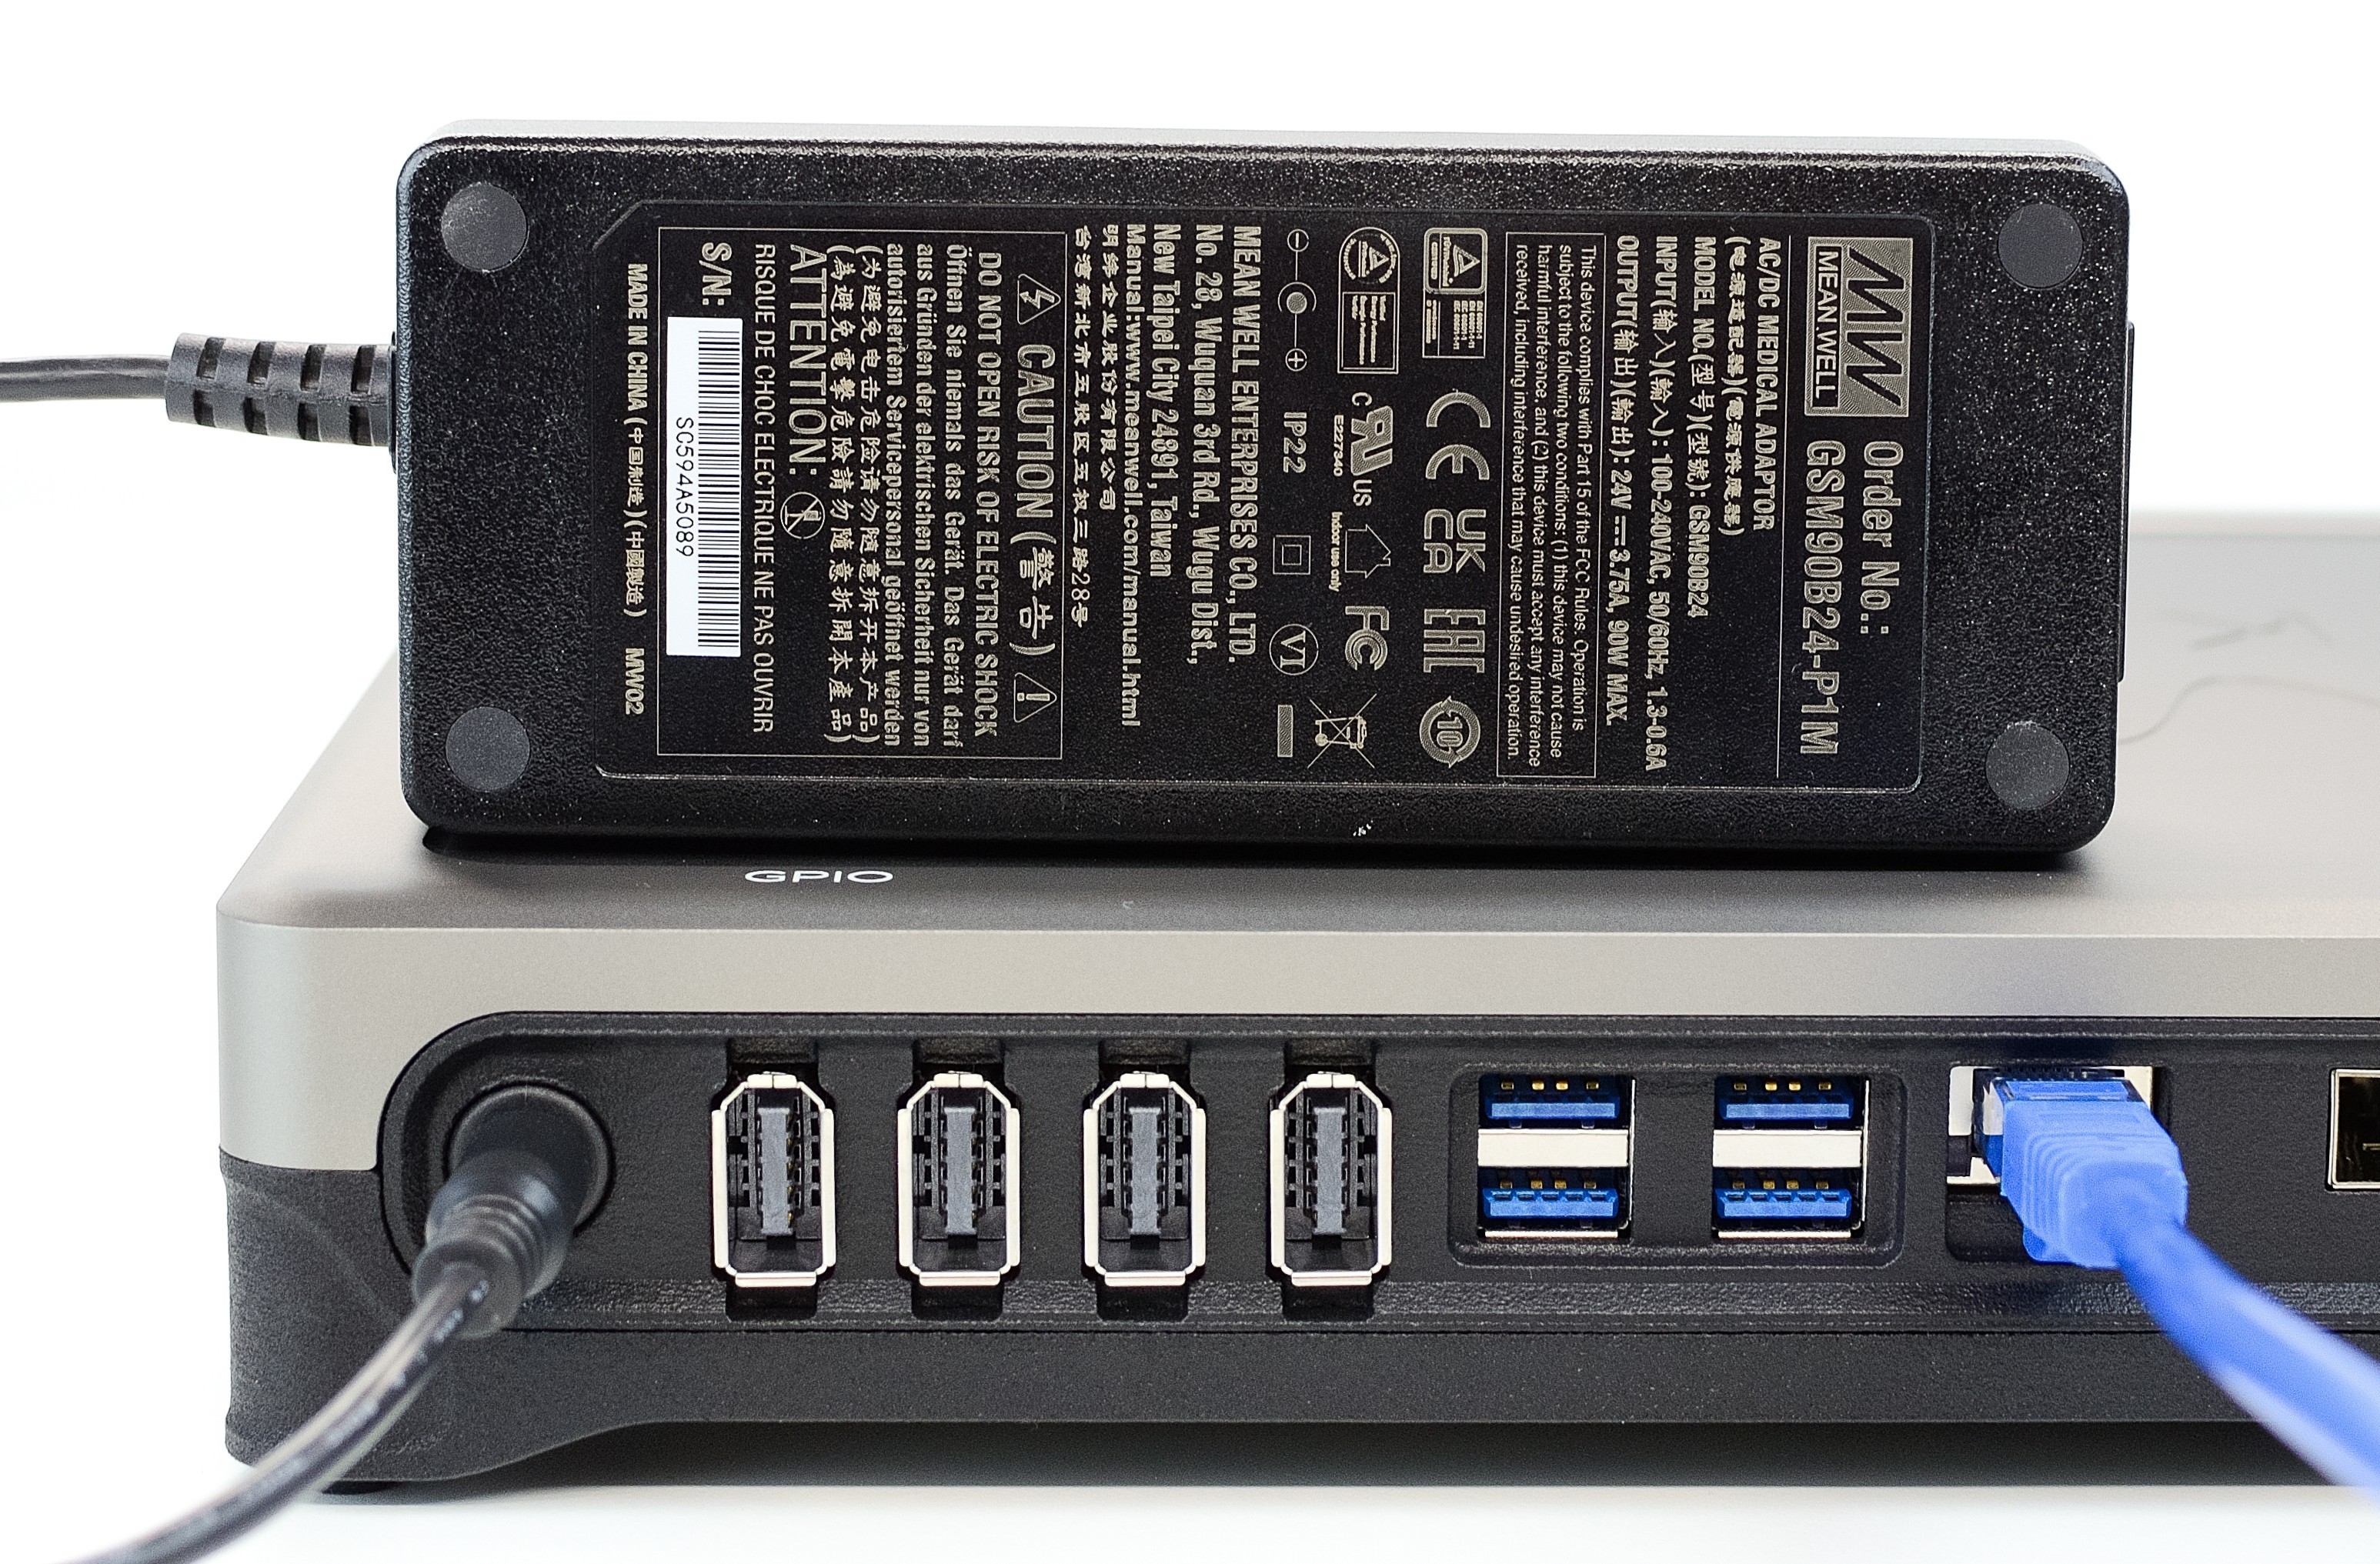
Power supply: 24V, 90W
Software Setup
Installing JupyterLab
Download the latest Jupyterlab Desktop installer for your system: https://github.com/jupyterlab/jupyterlab-desktop/releases
Run the installer and follow the install process.
Once the install is complete, tick the Run JupyterLab box and click Finish.
Once JupyterLab opens you will see an alert displayed at the bottom of the app that says “Python environment not found.”
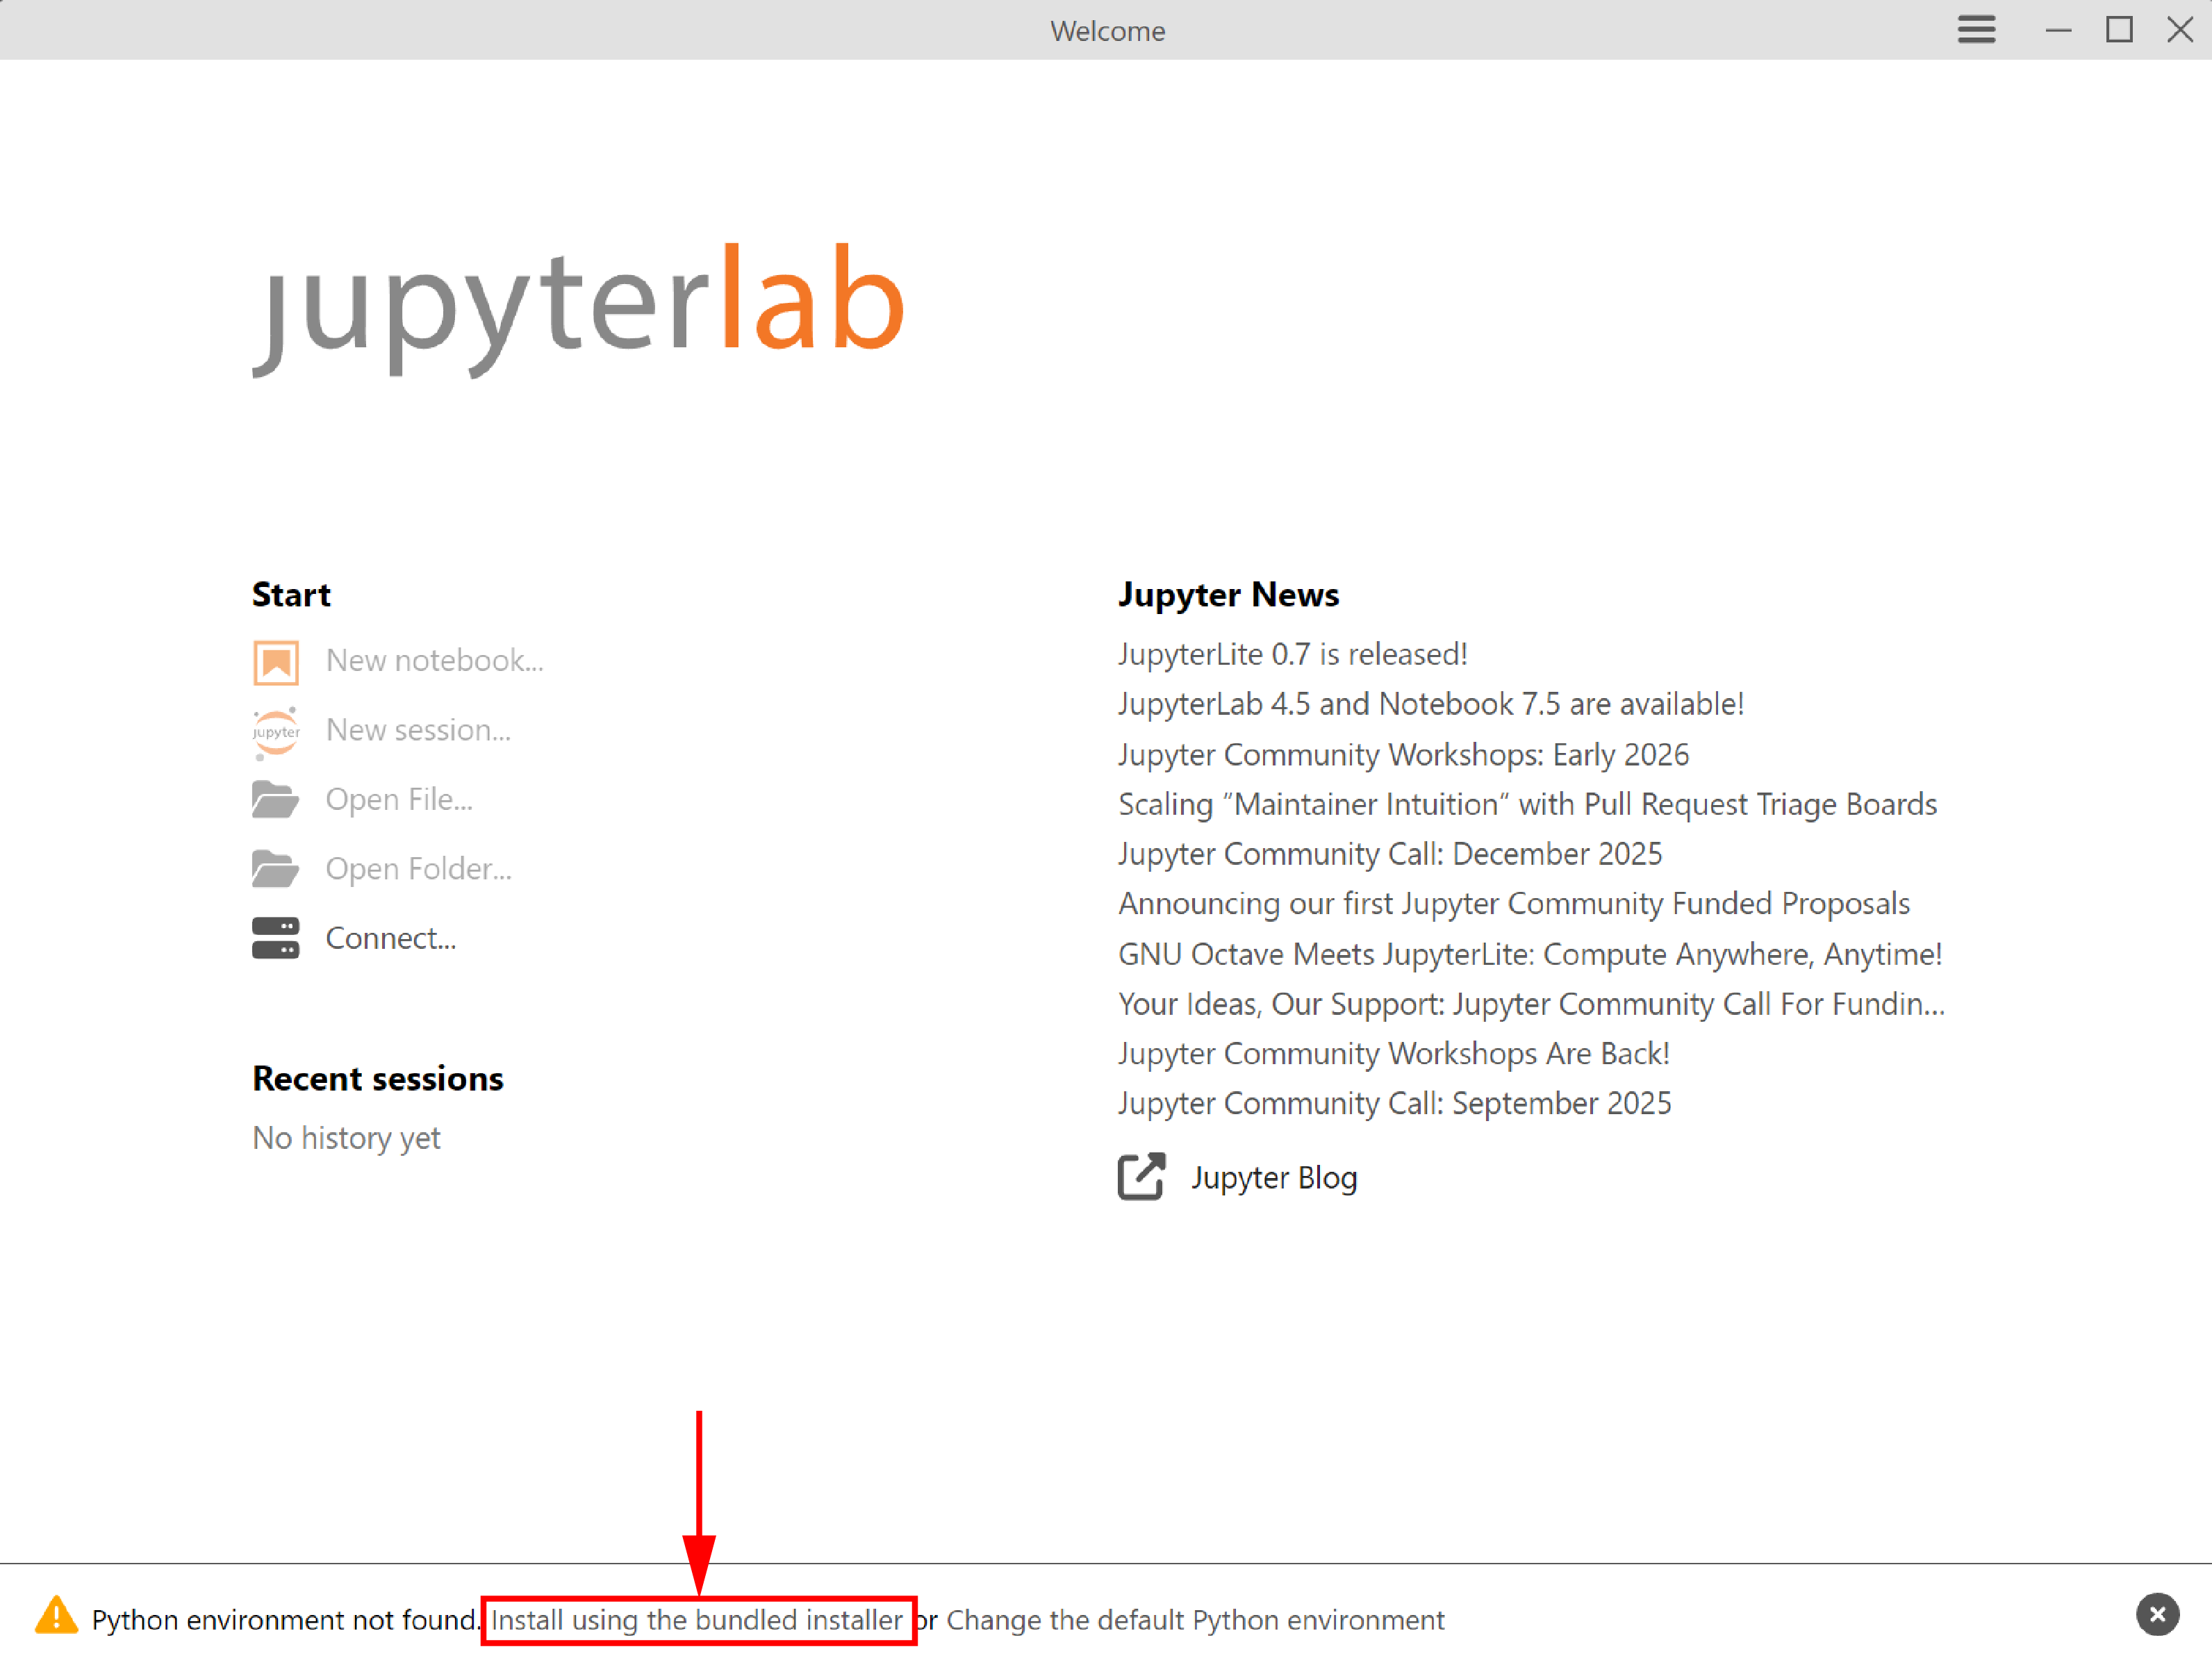
Installing the default python environment
Click “Install using the bundled installer”.
If you are already using JupyterLab Desktop, you may wish to create a new copy of the bundled environment instead to avoid modifying your existing environment
Extract the Kāhu workspace zip file provided with your spectrometer (contact info@resonint.com for a download link)
Return to JupyterLab.
Once the python environment is installed, the Open File and Open Folder buttons will be activated.
Click Open Folder and navigate to where you extracted the Kāhu workspace folder from the zip file. Select this folder and click Open.
The JupyterLab interface will now load.
Double click the file install.ipynb on the left and when it has loaded, click Run > Run All Cells to install matipo-python library and set up the default configuration.
Click “conda: jlab_server” in the top menu bar.
Click the reload icon to restart the session.
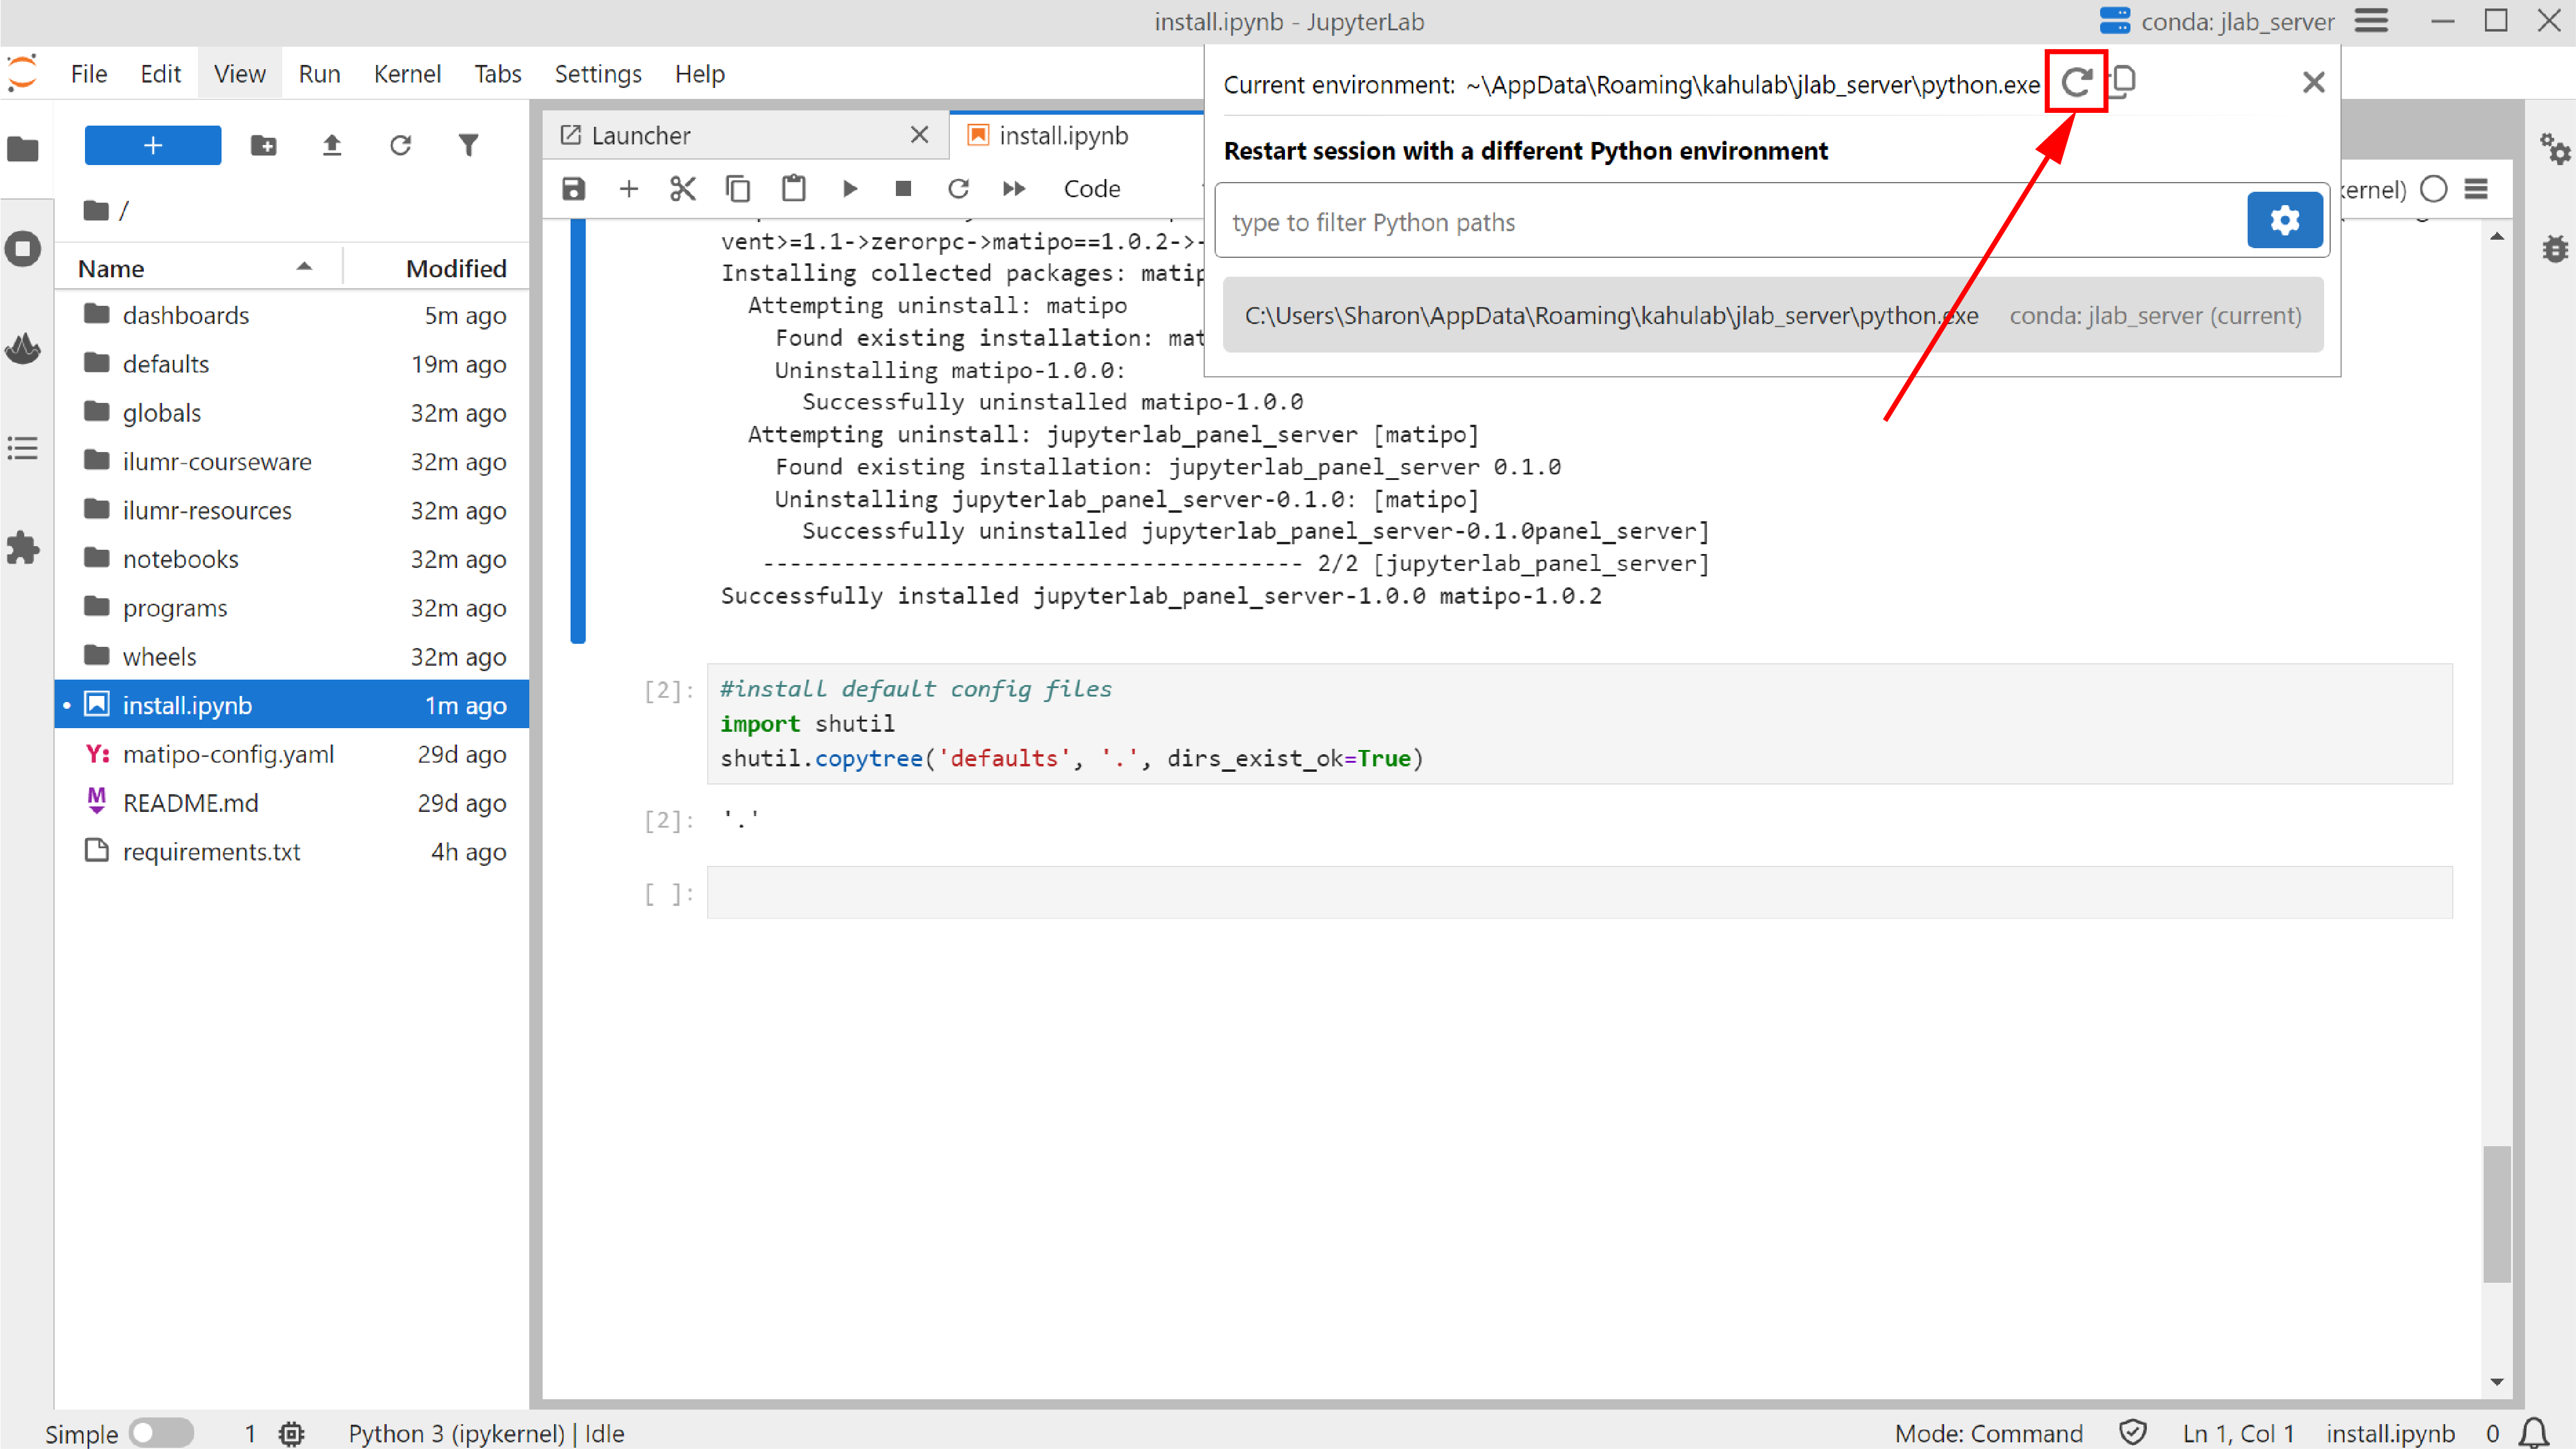
Restarting the session
The
 icon should appear in the left sidebar, which opens the dashboard menu.
Connecting to Kāhu
When connecting to Kāhu by direct ethernet cable from a PC, assign a manual IP with settings:
Address: 192.168.137.1
Netmask: 255.255.255.0
Gateway: 192.168.137.1
Kāhu may also be connected to a router via ethernet cable. In this case check the router admin page for the automatically assigned IP address. This IP address must be set in matipo-config.yaml file located in the kahu-workspace folder as the device_address.
After saving matipo-config.yaml you will need to click “conda: jlab_server” in the top menu bar then click the reload icon to restart the session in order to reload all dashboards and notebooks.
The default matipo-config.yaml file is created when you run install.ipynb,
and contains the default setting device_address: 192.168.137.2
Trouble Shooting
If you see the error similar to the following when loading a dashboard:
Error: [Errno 2] No such file or directory: 'C:\\Users\\user\\programs/find_freq.py'; in file C:\Users\user\Documents\kahu-workspace\dashboards\Utilities.py
You have not created the matipo-config.yaml file and need to complete steps 11-13 in the Installing JupyterLab section.